Welcome to the comprehensive guide on Wildview Trail Cameras! These cameras are designed for hunters and wildlife enthusiasts to monitor and capture images of animals in their natural habitats. With features like motion-activated shooting, night vision, and durable construction, Wildview Trail Cameras are ideal for scouting and wildlife observation. This guide will walk you through everything from setup to advanced features, ensuring you get the most out of your camera;
1.1 Overview of Wildview Trail Cameras
Wildview Trail Cameras are popular tools for hunters and wildlife enthusiasts, offering motion-activated imaging and video recording. Models like the WV16 and STC-TGLBC2 feature night vision, PIR sensors, and weather-resistant designs; These cameras are user-friendly, with intuitive menu systems for setting up timers, sensitivity, and resolution. They support external batteries and SD cards, making them reliable for long-term outdoor use. Designed for durability, Wildview cameras are ideal for monitoring wildlife in various environments, providing clear images and videos day and night. Their versatility makes them a favorite among outdoor enthusiasts and professionals alike.
1.2 Importance of Trail Cameras for Hunting and Wildlife Monitoring
Trail cameras, including Wildview models, are essential tools for hunters and wildlife enthusiasts. They provide valuable insights into animal behavior, patterns, and population dynamics. By capturing images and videos, these cameras help hunters identify game species, track movements, and plan effective strategies. For conservation efforts, they monitor wildlife health and habitat use without human interference. Their motion-activated and stealth features ensure minimal disruption, making them indispensable for both hunting and ecological studies. This data is crucial for informed decision-making in wildlife management and sustainable hunting practices, enhancing overall outdoor experiences and conservation goals.
Unboxing and Initial Setup
Unbox your Wildview Trail Camera and ensure all components are included. Carefully inspect the camera, mounting bracket, and cables. Read the manual to understand setup procedures for first-time use.
2.1 What’s Included in the Box
Upon unboxing your Wildview Trail Camera, you’ll find the camera unit, a mounting bracket, an external battery compartment, and a user manual. Additional items may include a USB cable for image transfer and a strap for securing the camera. Ensure all components are accounted for before proceeding with setup. The manual provides detailed instructions for each part, ensuring you’re prepared for proper installation and use.
2.2 Preparing the Camera for First Use
Before using your Wildview Trail Camera, ensure it is in the OFF position. Remove any protective covers from the lens and PIR sensor to prevent interference. Insert the recommended batteries and memory card, ensuring proper alignment and secure placement. Use only Wildview-approved accessories to avoid compatibility issues. Double-check that all components are correctly installed and the camera is ready for setup. Refer to the user manual for specific instructions tailored to your model. Proper preparation ensures optimal performance and extends the camera’s lifespan.
Battery and Memory Installation
Insert batteries and memory cards as per the manual. Use recommended specifications to ensure optimal performance. Always power off the camera during installation to prevent errors.
- Align battery terminals correctly.
- Secure memory card firmly.
3.1 Inserting Batteries
Inserting batteries into your Wildview Trail Camera is a straightforward process that requires attention to detail to ensure proper functionality. First, locate the battery compartment, typically found on the bottom or side of the camera. Open the compartment by sliding it or using the release latch, depending on the model. Next, insert the recommended type and number of batteries, ensuring the positive and negative terminals are correctly aligned to avoid any electrical issues. It’s important to use only Wildview-approved batteries or compatible alternatives to maintain optimal performance and safety. Once the batteries are securely in place, close the compartment tightly to protect them from environmental elements. Finally, turn the camera on to test if the batteries are installed correctly, checking for any indicator lights or power-up sequences. Proper battery installation is essential for the camera to function effectively in the field, providing reliable power for capturing images and videos of wildlife. By following these steps, you can ensure your Wildview Trail Camera is ready for use in monitoring and capturing the wildlife you’re interested in. Always refer to the user manual for specific instructions tailored to your camera model to avoid any potential issues or damage.
3.2 Installing the Memory Card
Installing the memory card in your Wildview Trail Camera is essential for storing images and videos. Begin by turning off the camera to prevent any electrical interference. Locate the memory card slot, typically found near the battery compartment. Gently insert the memory card, ensuring it is properly aligned and oriented as indicated by the camera’s markings. Once inserted, the camera will recognize the card automatically. If prompted, format the memory card using the camera’s menu options to ensure compatibility and optimal performance. Always use a memory card that meets the camera’s specifications for size and speed to avoid any issues with data storage or retrieval. Proper installation ensures your camera is ready to capture high-quality images and videos of wildlife effectively. By following these steps, you can securely store your wildlife observations and review them later with ease. Remember to handle the memory card carefully to prevent damage and maintain its functionality over time. This step is crucial for ensuring your trail camera operates smoothly and reliably in the field.
3.4 Recommended Battery and Memory Card Specifications
For optimal performance, use 4-8 AA alkaline batteries with a minimum capacity of 2500mAh. Lithium batteries are also suitable for colder environments. The camera supports SD, SDHC, and SDXC memory cards, with a recommended capacity of 32GB for extensive storage needs. Ensure the memory card is formatted in the camera before use to maintain compatibility and prevent errors. Avoid using low-quality or counterfeit cards, as they may cause data loss or camera malfunctions. Always refer to the user manual for specific voltage and capacity recommendations to ensure reliable operation in the field.

Setting Up the Camera
Power on the camera, navigate the menu to set date/time, and configure settings like resolution, motion detection, and timer functions for optimal performance and personalized use.
4.1 Turning On the Camera
Ensure the camera is in the OFF position. Insert the batteries and SD card as described in the manual. If using an external battery, connect it properly. Remove any PIR sensor protectors to ensure proper motion detection. Locate the ON/OFF button, typically found on the top of the camera. Press and hold the button until the camera powers on. The camera will now be ready for setup and configuration, allowing you to access the menu and customize settings according to your needs for optimal performance.
4.2 Navigating the Menu Options
Once the camera is on, press the Menu button to access the settings. Use the Up and Down arrows to scroll through options like camera settings, motion detection, and image review. Select an option by pressing the OK button. Adjust settings using the arrows and save changes by pressing OK again. To exit the menu, press the Menu button or let the camera timeout. Navigate through the menu to customize settings for optimal performance, ensuring your camera captures exactly what you need. This step ensures your camera is set up to meet your specific requirements.
4.3 Setting the Date and Time
After turning on the camera, navigate to the Date/Time option in the menu. Use the Up and Down arrows to select the correct date and time. Press OK to confirm each selection. Ensure the date is in MM/DD/YYYY format and the time in HH:MM:SS (12-hour format). Accurate date and time settings are crucial for organizing and reviewing images. Once set, press Menu to exit. This ensures all captured images are timestamped correctly, aiding in tracking wildlife activity patterns effectively. Proper setup guarantees precise and reliable data for your scouting efforts.
4.4 Configuring Camera Settings
Access the camera’s menu to configure various settings for optimal performance. Adjust the sensitivity level of the PIR sensor to reduce false triggers or capture more motion. Set the timer to define intervals between image captures or video recordings. Choose the desired image resolution and video length based on your needs. Enable or disable night vision settings to ensure clear images in low-light conditions. These configurations allow you to tailor the camera’s functionality to your specific requirements, ensuring high-quality captures of wildlife activity. Proper setup enhances both efficiency and image quality for effective scouting.

Mounting the Camera
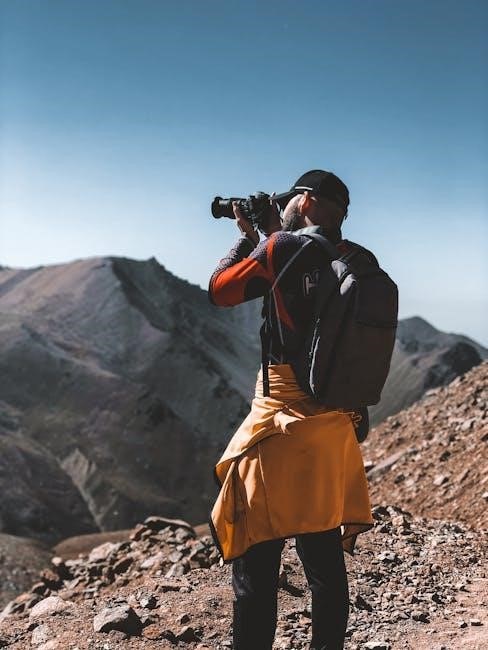
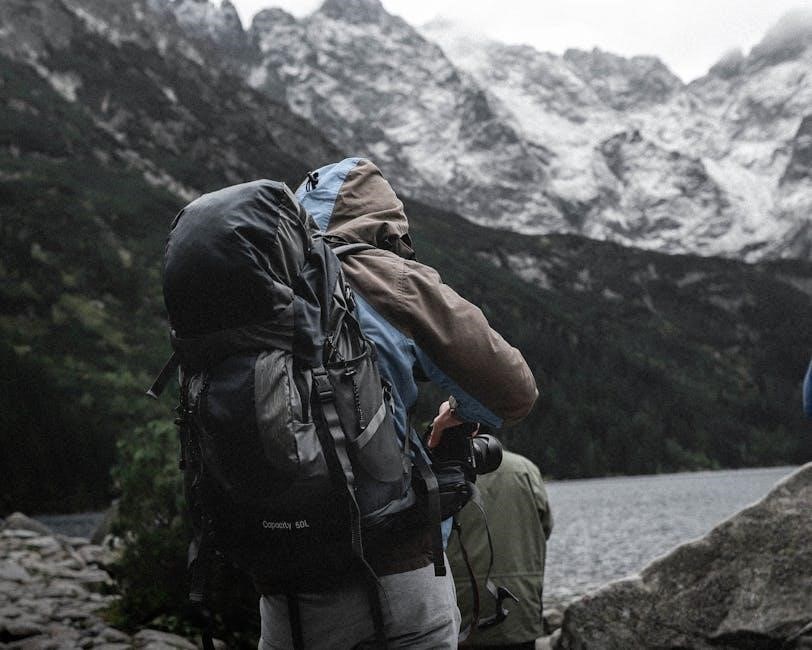
Mount the camera in a location with clear visibility of wildlife paths. Use the provided strap to secure it to a tree at an optimal height. Adjust the angle for the best field of view. Ensure the camera is level and stable for reliable performance. Proper mounting ensures effective wildlife monitoring and image capture.
5.1 Choosing the Best Location
Choosing the best location for your Wildview Trail Camera is crucial for optimal performance and image quality. Look for areas with high animal activity, such as game trails or food sources. Position the camera 3-4 feet above ground, facing north to avoid direct sunlight. Ensure the camera is level and clear any obstructing vegetation. This setup ensures reliable motion detection and clear photos. Proper placement enhances your ability to monitor wildlife effectively.
5.2 Securing the Camera to a Tree
To secure your Wildview Trail Camera to a tree, use the provided strap or a sturdy nylon strap. Loop the strap around the tree trunk and attach it to the camera’s mounting bracket. Tighten the strap firmly to ensure the camera is stable and won’t shift in the wind. Make sure the strap isn’t overly tight to avoid damaging the tree bark. Wrap any excess strap neatly around the tree to keep it organized. Double-check that the camera is tightly secured to prevent movement or theft. This ensures your camera remains in place for reliable wildlife monitoring.
5.3 Adjusting the Camera Angle
To adjust the camera angle on your Wildview Trail Camera, start by loosening the mounting bracket’s screws or knobs. This allows you to tilt the camera up or down and rotate it side to side. Position the camera to face the area where animal activity is expected, ensuring it captures the desired field of view. Once satisfied with the angle, tighten the screws or knobs to secure the camera in place. For optimal image quality, consider the camera’s height and use any built-in features like a level to ensure it’s straight. Patience and trial and error may be necessary to achieve the perfect angle, ensuring clear images and effective wildlife monitoring.

Using the Camera
Wildview Trail Cameras are activated by motion, timer, or manually, allowing you to capture images and videos of wildlife effortlessly. Perfect for hunting or wildlife observation, these cameras adapt to your monitoring needs, ensuring you never miss a moment.
6.1 Motion-Activated Shooting
The Wildview Trail Camera features motion-activated shooting, allowing it to automatically capture images or videos when movement is detected. This function relies on a PIR (Passive Infrared) sensor, which detects heat and motion within its range. When triggered, the camera rapidly captures the moment, making it ideal for monitoring wildlife without constant supervision. Users can adjust the sensitivity settings to minimize false triggers or ensure even slight movements are detected. This feature is particularly useful for hunters and wildlife enthusiasts seeking to document animal activity efficiently and discreetly.
6.2 Timed Shooting Mode
The Timed Shooting Mode allows the Wildview Trail Camera to capture images or videos at predetermined intervals, independent of motion detection. This feature is useful for monitoring activity patterns over time or in areas with less movement. Users can set the camera to take photos or videos at specific time gaps, such as every 5, 10, or 30 minutes. This mode is particularly beneficial for long-term surveillance, as it ensures consistent documentation of the environment. The timer can be configured via the menu, offering flexibility for various monitoring needs. This mode complements the camera’s motion-activated functionality, providing a robust monitoring solution.
6.3 Manual Shooting Mode
Manual Shooting Mode provides users with full control over when the camera captures images or videos. Unlike motion-activated or timed modes, this setting allows for instantaneous triggering, ideal for specific moments or close-up shots. To activate, navigate to the camera menu, select Manual Mode, and confirm. Once enabled, press the shutter button to capture images or start video recording. This mode is particularly useful for observing wildlife during known activity times or for capturing events that may not trigger the motion sensor. It offers flexibility for tailored monitoring and photography needs.

Image and Video Quality
Wildview Trail Cameras deliver high-resolution images and videos, capturing crisp details even in low-light conditions. Adjust settings to optimize resolution, ensuring clear wildlife captures for accurate scouting and monitoring.
7.1 Adjusting Resolution Settings
Adjusting the resolution on your Wildview Trail Camera ensures optimal image quality. Most models offer resolutions like 720p, 1080p, or higher. Lower resolutions save memory but reduce detail, while higher settings capture sharper images. Access the menu, navigate to the resolution option, and select your preferred setting using the arrow buttons. Higher resolutions are ideal for wildlife monitoring, as they provide clearer animal identification. Note that higher resolutions consume more memory, so consider your memory card capacity. Always review your camera’s manual for specific resolution options available on your model.
7.2 Video Recording Capabilities
Wildview Trail Cameras offer impressive video recording features, capturing wildlife activity with clarity. Most models record in HD or Full HD, providing detailed footage. You can adjust video length, typically ranging from 10 to 60 seconds, via the menu. Enable video mode for continuous or motion-triggered recording. Higher resolutions enhance video quality but consume more memory. Ensure your memory card has sufficient storage for extended recording sessions. Refer to your camera’s manual for specific video settings and capabilities, as they may vary by model. Proper setup ensures you capture essential wildlife behavior effectively. Always test video settings before deploying the camera.
7.3 Night Vision Settings
Wildview Trail Cameras feature advanced night vision capabilities, capturing clear images in low-light conditions using infrared LEDs. Enable night vision mode to ensure wildlife is recorded even after dark. Adjust sensitivity settings to minimize false triggers from environmental factors. Higher sensitivity increases detection range but may cause more false alerts. Use the camera’s menu to customize night vision settings, such as adjusting the IR flash intensity. Properly configured night vision ensures you capture nocturnal activity without missing critical moments. Test settings in the field to optimize performance for your specific environment. This feature is essential for 24/7 wildlife monitoring. Always check battery life, as night vision may drain power faster. Ensure your memory card has enough storage for extended nighttime recording sessions. Refer to your camera’s manual for model-specific night vision adjustments to maximize effectiveness. Regularly clean the lens to maintain clear night vision performance. Avoid pointing the camera directly at reflective surfaces to prevent overexposure. Adjust the camera angle to reduce glare from the sun or moon. Proper positioning ensures better image quality during both day and night. Use the timer feature to schedule when night vision is active, conserving battery life. Experiment with different settings to find the optimal balance between detection and image clarity. By fine-tuning these settings, you can effectively monitor wildlife activity around the clock. Always review images to ensure night vision settings are performing as expected. Adjustments may be needed based on the season or animal behavior patterns. Keep your camera’s firmware updated to benefit from the latest night vision enhancements. This ensures your Wildview Trail Camera operates at its best for reliable wildlife monitoring. For optimal results, avoid positioning the camera in shaded areas during the day, as this can affect night vision performance. Use the PIR sensitivity adjustments to reduce unnecessary triggers, such as those caused by wind or small animals. This helps conserve battery life and memory card space. By carefully configuring night vision settings, you can gather valuable insights into nocturnal wildlife activity. Always consider the local wildlife habits when setting up your camera to maximize the effectiveness of night vision recording. Regularly inspect and clean the infrared LEDs to ensure optimal performance. If images appear blurry or overexposed, adjust the camera’s position or sensitivity settings. Properly securing the camera to a tree or post is crucial for stable night vision recording. Use the included mounting strap to ensure the camera remains steady, even in windy conditions. By following these guidelines, you can effectively utilize your Wildview Trail Camera’s night vision capabilities for enhanced wildlife monitoring.
Viewing Images
Access stored images directly on the camera’s LCD screen or transfer them to a computer for enhanced viewing. Use the camera’s menu to navigate through photos, delete unwanted images, or organize them by date. The LCD screen provides a clear view of captured moments, allowing you to review and manage your wildlife photos effortlessly. This feature is essential for monitoring and analyzing wildlife activity in real-time, ensuring you never miss a shot.
8.1 Accessing Stored Images
To access stored images on your Wildview Trail Camera, power on the device and navigate to the image review menu using the navigation buttons. The camera organizes images by date and time, making it easy to locate specific photos. Use the arrow keys to scroll through the images, and delete unwanted ones directly from the camera. This feature allows you to manage your photos efficiently without transferring them to a computer. Ensure the camera is in review mode to avoid accidental deletions or settings changes while browsing.
8.2 Reviewing Photos on the Camera Screen
To review photos on the Wildview Trail Camera screen, navigate to the image review mode using the menu options. Use the directional buttons to scroll through captured images. Each photo displays the date, time, and camera settings used during capture. Zoom in on specific details by pressing the zoom button, allowing you to inspect images closely. Delete unwanted photos directly from the camera to free up memory. This feature ensures efficient image management without needing a computer. Use the review mode to evaluate photo quality and adjust camera settings as needed for improved results.
8.3 Transferring Images to a Computer
To transfer images from your Wildview Trail Camera to a computer, remove the memory card from the camera and insert it into a card reader. Connect the card reader to your computer using a USB cable. Open the file explorer on your computer and locate the memory card folder. Copy the desired images to your computer by dragging and dropping or using the copy-paste function. For organization, create folders or albums to store the images. Ensure the memory card is safely ejected before removing it from the card reader to prevent data loss. This method allows easy access and backup of your photos for further analysis or sharing.

Advanced Features
Explore advanced features like PIR sensor adjustments, sensitivity settings, and timer schedules to optimize your Wildview Trail Camera’s performance for specific monitoring needs and environments.
9;1 PIR Sensor Adjustments
Adjusting the PIR (Passive Infrared) sensor on your Wildview Trail Camera allows you to fine-tune motion detection sensitivity. This feature is crucial for capturing wildlife activity effectively. To access PIR settings, navigate to the advanced menu and select the sensitivity level. Lower settings reduce false triggers, while higher settings increase detection range. Ensure the sensor is clean and free from obstructions for optimal performance. Testing different settings in the field can help determine the ideal configuration for your specific environment and target species. Proper adjustment enhances image capture and reduces unnecessary battery drain.
9.2 Sensitivity Settings
Sensitivity settings on your Wildview Trail Camera control how easily the PIR sensor detects motion. Adjusting this feature allows you to customize detection based on your environment. Lower sensitivity reduces false triggers caused by wind or small animals, while higher sensitivity captures more movement, including distant or fast-moving subjects. Access sensitivity adjustments through the camera’s menu under advanced settings. Experiment with different levels to balance detection accuracy and battery life. Proper sensitivity calibration ensures you capture the wildlife activity you’re monitoring without unnecessary image captures.
9.3 Timer and Schedule Settings
Timer and schedule settings on your Wildview Trail Camera allow you to customize when and how the camera operates. Set specific start and end times for motion detection or video recording to conserve battery life. Scheduled intervals enable periodic photo or video captures, ensuring you don’t miss animal activity. Access these settings through the menu, where you can define timeframes and intervals. This feature is ideal for monitoring wildlife during peak hours while minimizing unnecessary captures. Proper scheduling enhances efficiency and ensures your camera is active when it matters most for capturing your target activity. Adjust these settings to suit your scouting needs.
Troubleshooting Common Issues
Common issues with Wildview Trail Cameras include the camera not turning on, memory card errors, or motion detection problems. Check battery connections, ensure the memory card is properly inserted, and verify sensitivity settings. Resetting the camera or updating firmware may resolve persistent issues. Always refer to the user manual for detailed troubleshooting steps to ensure optimal performance and reliability in the field. Regular maintenance and proper setup can help minimize these issues and extend the camera’s lifespan. Troubleshooting ensures your camera functions effectively for wildlife monitoring and hunting scouting purposes. Addressing these issues promptly ensures you never miss critical footage or photos of wildlife activity. Always follow the manufacturer’s guidelines for troubleshooting to avoid damaging the device. Persistent problems may require contacting customer support for assistance. By addressing common issues quickly, you can maintain the camera’s efficiency and reliability in various environmental conditions. This section provides practical solutions to help you overcome typical challenges and keep your Wildview Trail Camera operating smoothly. Troubleshooting is essential for maximizing the camera’s potential and ensuring it meets your expectations for capturing high-quality images and videos. Regular checks and maintenance can prevent many issues before they arise, ensuring your camera remains a reliable tool for wildlife monitoring and hunting preparations. Understanding and addressing common problems enhances your overall experience with the Wildview Trail Camera, making it a valuable asset for outdoor activities. Always prioritize proper care and maintenance to extend the camera’s lifespan and performance. Troubleshooting common issues ensures your Wildview Trail Camera continues to deliver exceptional results in the field. By following the guidelines and tips provided, you can efficiently resolve any problems and enjoy uninterrupted use of your camera for scouting and wildlife observation. This section equips you with the knowledge to handle common challenges and keep your camera functioning at its best. Troubleshooting is a crucial step in maintaining the effectiveness of your Wildview Trail Camera, ensuring it remains a trusted tool for your outdoor adventures. Regularly addressing issues and performing maintenance ensures your camera continues to capture stunning images and videos with precision and reliability. With proper care and attention, your Wildview Trail Camera will remain a vital asset for years to come, providing you with valuable insights into wildlife activity and helping you prepare for successful hunting trips. Addressing common issues promptly ensures your camera remains in optimal working condition, ready to capture the moments that matter most in the great outdoors; By mastering the troubleshooting process, you can confidently rely on your Wildview Trail Camera to deliver high-quality results every time. This guide provides you with the necessary tools and knowledge to overcome any challenges and keep your camera performing at its best. Troubleshooting common issues is an essential part of owning a Wildview Trail Camera, and with the right approach, you can ensure it continues to meet your needs for wildlife monitoring and scouting. Always remember to refer to the user manual for specific instructions and guidelines to resolve any issues effectively; By taking proactive steps to address common problems, you can enhance the longevity and performance of your Wildview Trail Camera, making it a indispensable tool for your outdoor activities. Troubleshooting ensures your camera remains reliable and efficient, capturing the images and videos you need to succeed in your hunting and wildlife observation endeavors. With the tips and solutions provided in this section, you can confidently overcome any challenges and enjoy uninterrupted use of your Wildview Trail Camera. Regular maintenance and prompt issue resolution are key to maximizing the camera’s potential and ensuring it remains a valuable asset for your outdoor adventures. By understanding and addressing common issues, you can extend the life of your Wildview Trail Camera and continue to rely on it for high-quality results in the field. This guide empowers you with the knowledge to troubleshoot and maintain your camera effectively, ensuring it remains a trusted companion for all your wildlife monitoring and hunting needs. Troubleshooting common issues is a straightforward process when you follow the steps outlined in this section, allowing you to keep your Wildview Trail Camera in optimal condition and ready for action. By prioritizing proper care and maintenance, you can ensure your camera continues to deliver exceptional performance and capture the moments that matter most. With the right approach to troubleshooting, your Wildview Trail Camera will remain a reliable and efficient tool for years to come, providing you with the insights and images you need to succeed in your outdoor pursuits. This section provides you with the essential information to handle common challenges and keep your camera functioning at its best, ensuring you never miss out on critical wildlife activity. By addressing issues promptly and performing regular maintenance, you can extend the lifespan of your Wildview Trail Camera and enjoy uninterrupted use for all your scouting and wildlife observation needs. Troubleshooting is an integral part of camera ownership, and with the guidance provided here, you can resolve common problems with ease and confidence. This ensures your Wildview Trail Camera remains a vital and dependable tool for your hunting and wildlife monitoring efforts. By following the troubleshooting steps and maintenance tips outlined in this guide, you can keep your camera in top condition and ensure it continues to deliver the high-quality results you expect. Addressing common issues promptly is crucial for maintaining the performance and longevity of your Wildview Trail Camera, allowing it to remain a trusted asset for your outdoor activities. With the knowledge and solutions provided in this section, you can overcome any challenges and enjoy continued success with your camera in the field. Troubleshooting common issues ensures your Wildview Trail Camera remains a reliable and essential tool for all your wildlife monitoring and hunting needs, providing you with the images and insights necessary to achieve your goals. By understanding how to address common problems, you can maximize the potential of your camera and ensure it remains a valuable companion for your outdoor adventures. This guide equips you with the necessary tools and knowledge to troubleshoot and maintain your Wildview Trail Camera effectively, ensuring it continues to deliver exceptional results for years to come. Regular maintenance and prompt issue resolution are key to keeping your camera in optimal condition, allowing you to capture the images and videos that matter most. With the troubleshooting tips and solutions provided here, you can confidently overcome any challenges and enjoy uninterrupted use of your Wildview Trail Camera. By prioritizing proper care and maintenance, you can extend the lifespan of your camera and ensure it remains a reliable tool for your hunting and wildlife observation efforts. Troubleshooting common issues is a straightforward process when you follow the steps outlined in this guide, allowing you to keep your Wildview Trail Camera in top working condition. This section provides you with the essential information to handle common challenges and maintain your camera’s performance, ensuring it continues to meet your needs for wildlife monitoring and scouting. By addressing issues promptly and performing regular maintenance, you can ensure your Wildview Trail Camera remains a vital and dependable asset for your outdoor activities. With the knowledge and solutions provided in this guide, you can overcome common problems and enjoy continued success with your camera in the field. Troubleshooting ensures your Wildview Trail Camera remains a reliable and efficient tool for capturing the images and videos you need to succeed in your hunting and wildlife observation endeavors. By following the tips and steps outlined here, you can keep your camera in optimal condition and ensure it continues to deliver high-quality results. This guide empowers you with the necessary tools and knowledge to troubleshoot and maintain your Wildview Trail Camera effectively, ensuring it remains a trusted companion for all your outdoor adventures. Regular maintenance and prompt issue resolution are crucial for maximizing the camera’s potential and ensuring it remains a valuable asset for your wildlife monitoring and hunting needs. With the right approach to troubleshooting, your Wildview Trail Camera will continue to provide you with the insights and images necessary to achieve your goals. By understanding how to address common issues, you can extend the life of your camera and ensure it remains a dependable tool for your outdoor activities. This section provides you with the essential information to handle common challenges and keep your Wildview Trail Camera functioning at its best, ensuring you never miss out on critical wildlife activity. By addressing issues promptly and performing regular maintenance, you can ensure your camera remains in optimal condition and ready for action. Troubleshooting common issues is an integral part of camera ownership, and with the guidance provided here, you can resolve common problems with ease and confidence. This ensures your Wildview Trail Camera remains a vital and dependable tool for your hunting and wildlife monitoring efforts. By following the troubleshooting steps and maintenance tips outlined in this guide, you can keep your camera in top condition and ensure it continues to deliver the high-quality results you expect. Addressing common issues promptly is crucial for maintaining the performance and longevity of your Wildview Trail Camera, allowing it to remain a trusted asset for your outdoor activities. With the knowledge and solutions provided in this section, you can overcome any challenges and enjoy continued success with your camera in the field. Troubleshooting ensures your Wildview Trail Camera remains a reliable and essential tool for all your wildlife monitoring and hunting needs, providing you with the images and insights necessary to achieve your goals. By understanding how to address
10.1 Camera Not Turning On
If your Wildview Trail Camera fails to turn on, first check the battery connections. Ensure batteries are correctly inserted and not drained. Verify the power button is functioning properly. If using an external battery, confirm it’s connected correctly. Check for any visible damage to the battery compartment or wiring. Try replacing batteries or using a different power source. If issues persist, inspect for physical damage or corrosion. Resetting the camera by removing and reinserting batteries may resolve the problem. Consult the user manual for specific reset instructions. If none of these steps work, contact customer support for further assistance.