Seenda Wireless Keyboard Manual: A Comprehensive Guide
This manual provides detailed instructions for setting up‚ using‚ and maintaining your Seenda wireless keyboard‚ ensuring optimal performance and a seamless user experience.
Welcome to the world of seamless connectivity and ergonomic design with your new Seenda wireless keyboard! This keyboard is engineered to provide a comfortable and efficient typing experience for a variety of applications‚ from everyday tasks to professional work. It offers versatile connectivity options‚ including Bluetooth and a 2.4GHz wireless receiver‚ allowing you to connect to multiple devices effortlessly.
The Seenda keyboard boasts features like adjustable brightness‚ multimedia controls‚ and a dedicated emoji key‚ enhancing your productivity and enjoyment. This manual will guide you through the setup process‚ explain the functions of each key‚ and provide troubleshooting tips to ensure you get the most out of your new device. Prepare to elevate your computing experience!
Unboxing and Contents
Carefully unpack your Seenda wireless keyboard and verify that all components are present. The box should contain the following items: one Seenda wireless keyboard‚ a 2.4GHz USB receiver (often stored within the keyboard or packaging)‚ a USB-C charging cable‚ and this user manual. Inspect all items for any signs of damage that may have occurred during shipping.
If any components are missing or damaged‚ please contact Seenda support immediately for assistance. Retain the original packaging for potential returns or warranty claims. Before proceeding‚ familiarize yourself with the keyboard’s layout and key functions as described in this manual. Proper unboxing ensures a smooth setup process.
System Requirements
To ensure compatibility and optimal functionality‚ your system must meet the following requirements to use the Seenda wireless keyboard. This keyboard is compatible with Windows 10 or later‚ macOS 10.10 or later‚ and Android 5.0 or later. A free USB port is required for the 2.4GHz wireless receiver‚ or a Bluetooth-enabled device for wireless connection.
Ensure your operating system is up-to-date with the latest drivers and updates. While generally plug-and-play‚ some older systems might require minimal driver installation. Verify Bluetooth is enabled in your system settings if opting for a Bluetooth connection. Meeting these requirements guarantees a seamless user experience.

Setting Up Your Seenda Keyboard
This section details the straightforward process of connecting your Seenda keyboard‚ whether utilizing the 2.4GHz receiver or a Bluetooth connection for wireless operation.
Initial Pairing Process
Before first use‚ ensure your Seenda keyboard is sufficiently charged. To initiate pairing‚ locate the pairing button – typically found on the underside of the keyboard. Press and hold this button until the LED indicator begins to flash‚ signifying it’s in pairing mode.
On your device (computer‚ tablet‚ etc.)‚ navigate to the Bluetooth settings and scan for available devices. The Seenda keyboard should appear in the list. Select it to begin the pairing process. You may be prompted to enter a pairing code; if so‚ enter “0000” or consult the keyboard’s quick start guide.

Once paired‚ the LED indicator will typically turn solid‚ confirming a successful connection. Repeat this process for each device you wish to connect the keyboard to.
Connecting via Bluetooth
Bluetooth offers a wireless connection without the need for a receiver. First‚ activate Bluetooth on your computer or device. Ensure your Seenda keyboard is powered on and in pairing mode – indicated by a flashing LED.
Within your device’s Bluetooth settings‚ scan for available devices. “Seenda Keyboard” should appear in the list. Select it to initiate the pairing process. A pairing request may appear; confirm it.
If prompted for a passcode‚ enter “0000”. Upon successful connection‚ the LED indicator will become solid. You can now use the keyboard. Remember to select the correct keyboard profile if multiple Bluetooth keyboards are connected.
Connecting via 2.4GHz Wireless Receiver
The 2.4GHz receiver provides a stable‚ long-range connection. Locate the USB receiver included with your Seenda keyboard. Plug it into an available USB port on your computer. Ensure the keyboard is powered on. The keyboard should automatically connect to the receiver.
If it doesn’t connect automatically‚ press the connection button (often located on the underside of the keyboard) until the LED indicator flashes. The receiver and keyboard will then pair.
Once connected‚ the LED will become solid. This method is ideal for devices lacking Bluetooth capability. No driver installation is typically required; it’s plug-and-play.
Troubleshooting Connection Issues
If your Seenda keyboard isn’t connecting‚ first ensure it’s powered on and sufficiently charged. Check the USB receiver is firmly plugged into your computer. Try a different USB port. For Bluetooth connections‚ verify Bluetooth is enabled on your device.
If using the 2.4GHz receiver‚ re-pair the keyboard by pressing the connection button. Interference from other wireless devices can cause issues; move them away. Restarting your computer can often resolve connection problems.
Ensure the keyboard isn’t paired with another device simultaneously. If problems persist‚ consult the Seenda support website.
Keyboard Features and Functions
Explore the Seenda keyboard’s diverse features‚ including specialized keys‚ multimedia controls‚ adjustable brightness‚ and convenient emoji functionality for enhanced usability.
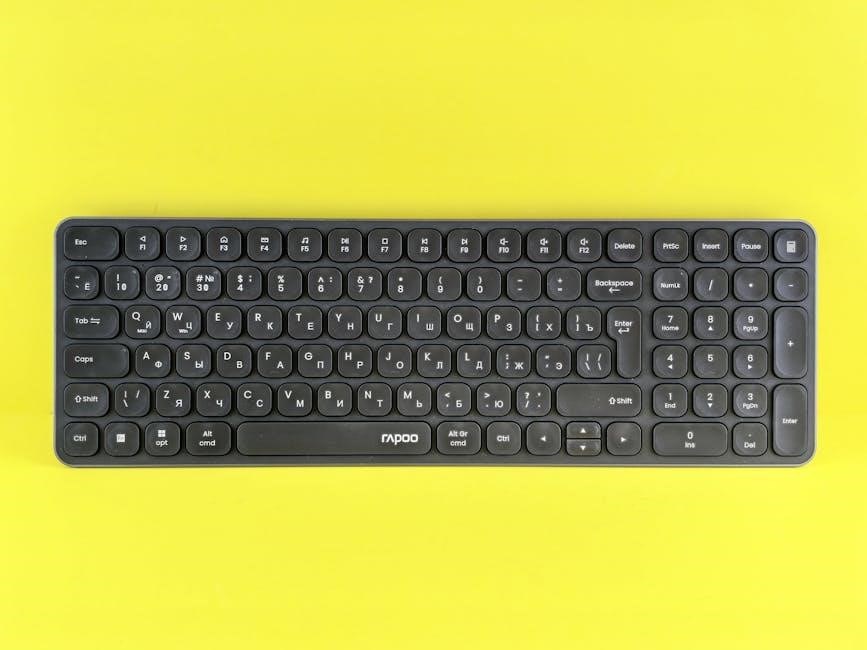
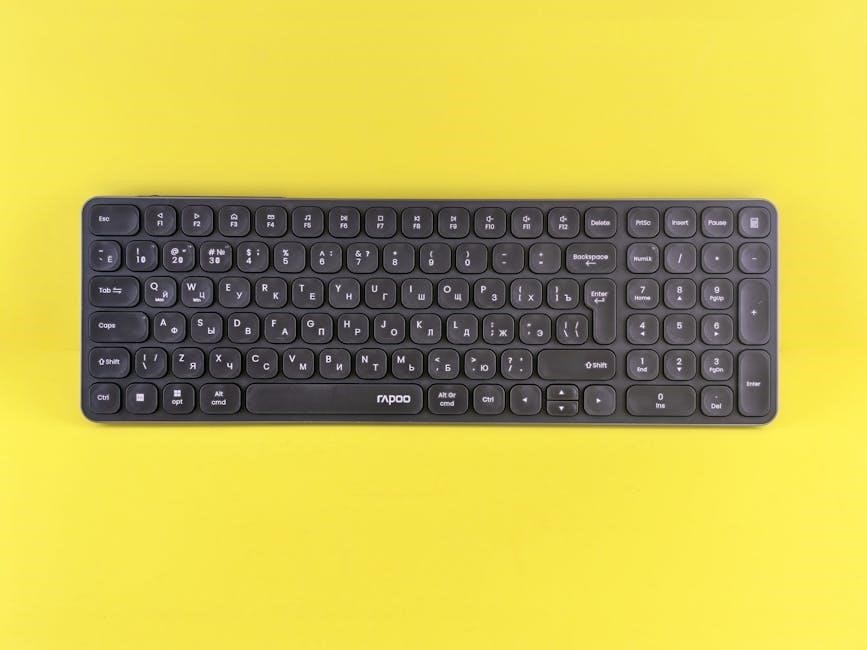
Key Layout and Special Keys
The Seenda wireless keyboard boasts a thoughtfully designed key layout‚ prioritizing ergonomic comfort and efficient typing. Standard QWERTY arrangement ensures familiarity‚ while dedicated function keys provide quick access to essential commands. Discover specialized keys for multimedia control – play‚ pause‚ volume adjustment – streamlining your entertainment experience. A dedicated Emoji key simplifies expression‚ allowing swift insertion of emoticons into your messages. Explore the function key combinations to unlock further customization options‚ tailoring the keyboard to your specific workflow. These special keys enhance productivity and convenience‚ making your interactions smoother and more enjoyable. Familiarize yourself with their locations and functions for optimal use.
Multimedia Controls
The Seenda wireless keyboard integrates convenient multimedia controls directly into its function keys‚ enhancing your entertainment experience. Easily manage audio playback with dedicated keys for play/pause‚ stop‚ and volume adjustment – up‚ down‚ and mute. Navigate through playlists and videos seamlessly without interrupting your workflow. These controls are typically activated using the ‘Fn’ key in combination with the corresponding function key. Enjoy effortless control over your music and videos‚ creating a more immersive and enjoyable computing experience. Explore the specific key combinations to discover the full range of multimedia functionalities available on your Seenda keyboard.
Adjustable Brightness Settings
Your Seenda wireless keyboard features adjustable backlight brightness to cater to various lighting conditions and user preferences. Cycle through three distinct brightness levels – low‚ medium‚ and high – using the dedicated brightness control key‚ often activated with the ‘Fn’ key combination. This allows for comfortable viewing in dimly lit environments while conserving battery life when maximum brightness isn’t required. The adjustable brightness enhances visibility of the keys‚ improving typing accuracy and reducing eye strain. Customize the backlight to suit your needs and enjoy a personalized typing experience with your Seenda keyboard.
Emoji Key Functionality
The Seenda wireless keyboard incorporates a dedicated Emoji key‚ providing quick and convenient access to a wide range of emoticons and symbols. Simply press the Emoji key to activate the emoji selection panel‚ allowing you to effortlessly insert emojis into your messages‚ emails‚ and documents. This feature streamlines communication and adds personality to your digital interactions. The intuitive emoji picker makes it easy to find the perfect emoji to express your thoughts and feelings. Enjoy enhanced expressiveness and a more engaging typing experience with the Seenda keyboard’s emoji functionality.

Power Management
Efficient power usage is key; this section details charging procedures‚ LED indicators‚ battery life optimization‚ and low battery warnings for your Seenda keyboard.
Charging the Keyboard
To charge your Seenda wireless keyboard‚ connect the provided USB cable to the keyboard’s charging port and a powered USB source. During charging‚ the LED indicator will illuminate‚ signifying the charging process is active. A full charge typically takes approximately 2-3 hours‚ depending on the keyboard’s initial battery level and the USB port’s power output.
It’s recommended to use a standard 5V/500mA USB power adapter for optimal charging. Avoid using fast-charging adapters‚ as they may potentially damage the battery. Once fully charged‚ the LED indicator will change color or turn off‚ indicating the keyboard is ready for use. Disconnect the USB cable after charging is complete to conserve energy.
LED Indicator Lights and Their Meanings
The Seenda wireless keyboard utilizes LED indicator lights to convey crucial information regarding its status. A solid red light typically indicates the keyboard is charging. Once fully charged‚ the light will usually turn solid green or blue. A blinking red light signals a low battery level‚ prompting you to charge the device.
During the pairing process‚ a blinking blue light confirms the keyboard is in discovery mode. A solid blue light signifies a successful Bluetooth connection. If the light doesn’t illuminate‚ ensure the keyboard is powered on. Refer to the troubleshooting section if issues persist.
Battery Life and Optimization
The Seenda wireless keyboard boasts an impressive battery life‚ offering extended usage between charges. Typical battery life ranges from several weeks to months‚ depending on usage intensity and brightness settings. To optimize battery performance‚ reduce the screen brightness when possible and disable unnecessary features.
Avoid leaving the keyboard connected to a power source after it’s fully charged‚ as this can potentially shorten the battery’s lifespan. Regularly using the keyboard also helps maintain optimal battery health. A low battery warning will appear when charging is needed.
Low Battery Warning
Your Seenda wireless keyboard provides a clear indication when the battery is running low. A red LED indicator light will begin to flash‚ alerting you to the need for recharging. This warning typically appears when approximately 10-15% of battery life remains‚ giving you ample time to connect the keyboard to a power source.
Ignoring the low battery warning may result in the keyboard unexpectedly powering off during use. Promptly charging the keyboard upon receiving this notification ensures uninterrupted operation and prevents data loss.
Advanced Settings and Customization
Explore personalized settings! Adjust language preferences‚ key repeat rates‚ and potentially program macros for enhanced efficiency and a tailored typing experience.
Keyboard Language Settings
Your Seenda wireless keyboard supports multiple language layouts‚ allowing you to type comfortably in your preferred language. To change the keyboard language‚ access the settings menu on your connected device (computer or tablet).
Typically‚ this involves navigating to the language and region settings within your operating system. From there‚ you can add or remove language packs and select your desired input method. The keyboard will then adapt to the chosen language’s character set and layout.
Ensure the correct language pack is installed on your device for optimal functionality. Refer to your device’s operating system documentation for specific instructions on managing language settings;
Key Repeat and Delay Settings
Adjusting key repeat and delay settings allows you to customize the keyboard’s responsiveness to your typing style. These settings control how quickly a key repeats when held down and the initial delay before repetition begins. Access these options through your operating system’s keyboard settings panel.
A shorter delay and faster repeat rate are ideal for rapid typing‚ while a longer delay and slower repeat rate can prevent accidental multiple inputs. Experiment with different settings to find what feels most comfortable and efficient for you.
Remember to save your changes after adjusting these parameters to ensure they are applied correctly.
Macro Programming (If Applicable)
If your Seenda keyboard supports macro programming‚ you can assign complex sequences of keystrokes to a single key. This feature streamlines repetitive tasks‚ boosting productivity in applications like gaming‚ coding‚ or document creation. Dedicated software‚ downloadable from the Seenda website‚ is typically required for macro configuration.

The software allows you to record‚ edit‚ and save macros‚ assigning them to specific keys on the keyboard. Explore the software’s interface to learn about available options and customization features. Remember to save your macro profiles for future use.

Troubleshooting Common Issues
This section offers solutions to frequently encountered problems‚ such as connectivity issues‚ unresponsive keys‚ or LED indicator malfunctions‚ ensuring smooth operation.
Keyboard Not Responding
If your Seenda keyboard isn’t responding‚ first‚ check the power switch to ensure it’s turned on. Verify the batteries are adequately charged or‚ if using a rechargeable model‚ that it’s properly connected to a power source. Next‚ attempt to reconnect the keyboard via Bluetooth or the 2.4GHz receiver – sometimes a simple re-pairing resolves the issue.
Ensure the receiver is firmly plugged into a working USB port. Try a different USB port to rule out a port malfunction. Confirm your operating system recognizes the keyboard in device settings. If problems persist‚ restart your computer; this often resolves temporary software conflicts. Finally‚ consult the Seenda support website for further assistance and potential driver updates.
Keys Not Working
If specific keys on your Seenda keyboard are unresponsive‚ begin by cleaning the keyboard thoroughly to remove any dust or debris that might be obstructing the key mechanisms. Ensure no software conflicts are present; recently installed programs can sometimes interfere with keyboard functionality. Check your operating system’s keyboard settings to confirm the correct language and input method are selected.
Try testing the keyboard in a different application to determine if the issue is application-specific. If the problem persists‚ consider updating the keyboard drivers or reinstalling them. A system restart can also resolve temporary glitches. If individual keys remain faulty‚ contact Seenda support for potential repair or replacement options.
Connection Drops Frequently
Experiencing frequent disconnections with your Seenda keyboard? First‚ verify the battery level; a low battery can cause intermittent connectivity. Ensure the USB receiver (if applicable) is securely plugged into your computer and try a different USB port. For Bluetooth connections‚ move the keyboard closer to your device‚ minimizing obstructions like walls or other wireless devices.
Check for interference from other Bluetooth devices or wireless networks. Update your computer’s Bluetooth drivers and the keyboard’s firmware if updates are available. Restarting both your keyboard and computer can often resolve temporary connection issues. If problems continue‚ contact Seenda support for assistance.
LED Light Not Turning On
If the LED indicator light on your Seenda keyboard isn’t illuminating‚ the first step is to confirm the keyboard is adequately charged. Connect it to a power source using the provided USB cable and allow sufficient charging time. Verify the USB connection is secure at both ends. A faulty USB cable could also be the culprit; try a different cable if possible.
If the light still doesn’t turn on after charging‚ attempt a reset by disconnecting and reconnecting the keyboard. Check the power adapter and USB port for functionality. If the issue persists‚ contact Seenda customer support for further troubleshooting or potential warranty assistance.
Maintenance and Care
Regular cleaning and proper storage will extend the life of your Seenda keyboard‚ preventing damage and ensuring continued optimal performance and reliability.
Cleaning the Keyboard
To maintain your Seenda wireless keyboard’s pristine condition‚ regular cleaning is essential. Always disconnect the keyboard from your device before commencing any cleaning procedures. Use a soft‚ dry cloth to gently wipe the surface‚ removing dust and debris. For stubborn marks‚ lightly dampen the cloth with isopropyl alcohol – never spray liquid directly onto the keyboard.
Avoid abrasive cleaners or solvents‚ as these can damage the keycaps and finish. A can of compressed air can effectively dislodge particles from between the keys. Gently turn the keyboard upside down and use short bursts to clear any accumulated dust. Pay particular attention to areas around the frequently used keys; Consistent‚ gentle cleaning will ensure your Seenda keyboard remains hygienic and functions optimally for years to come.
Storage Guidelines
Proper storage is crucial when your Seenda wireless keyboard isn’t in use‚ protecting it from potential damage. When storing‚ ensure the keyboard is completely dry and free from dust or debris; Ideally‚ store it in a cool‚ dry place away from direct sunlight and extreme temperatures. Avoid placing heavy objects on top of the keyboard‚ as this could damage the keys or internal components.
Consider using the original packaging or a protective sleeve to prevent scratches and accidental impacts. If storing for an extended period‚ remove the batteries to prevent corrosion. Regularly check the storage location for any signs of moisture or pests. Following these guidelines will help preserve your Seenda keyboard’s functionality and longevity.
Avoiding Damage
To maximize the lifespan of your Seenda wireless keyboard‚ take precautions to prevent damage. Avoid exposing the keyboard to liquids; spills can cause irreversible internal damage. Do not attempt to disassemble the keyboard‚ as this will void the warranty and could lead to malfunction. Refrain from dropping or subjecting the keyboard to strong impacts.
Be gentle when pressing the keys‚ avoiding excessive force. Keep the keyboard away from extreme temperatures and humidity. Regularly clean the keyboard to prevent dust and debris buildup‚ which can hinder key functionality. Proper handling and care will ensure your Seenda keyboard remains a reliable input device for years to come.

Warranty Information
Seenda offers a warranty against manufacturing defects; details regarding coverage duration‚ claim procedures‚ and support contact information are outlined below for your convenience.
Warranty Coverage
Seenda warrants this wireless keyboard to be free from defects in materials and workmanship for a period of twelve (12) months from the date of original purchase. This warranty extends only to the original purchaser and does not cover damage resulting from misuse‚ abuse‚ accidents‚ modifications‚ or normal wear and tear.
Specifically excluded are issues caused by improper cleaning‚ exposure to extreme temperatures or humidity‚ or unauthorized repairs. The warranty does not cover cosmetic damage‚ including scratches or dents‚ that do not affect the functionality of the keyboard.
Seenda’s responsibility under this warranty is limited to repairing or replacing‚ at its discretion‚ any defective product. This warranty gives you specific legal rights‚ and you may have other rights which vary by jurisdiction.
How to Claim Warranty
To initiate a warranty claim‚ please contact Seenda Support with your proof of purchase (receipt or invoice) and a detailed description of the defect. Include the keyboard’s model number and serial number‚ if available. Our support team will provide you with a Return Merchandise Authorization (RMA) number and instructions for returning the product.
Please securely package the keyboard to prevent damage during shipping. Seenda is not responsible for damage incurred during return shipping.
Upon receiving the returned product‚ Seenda will assess the defect and‚ if covered under warranty‚ will repair or replace the keyboard. The turnaround time for warranty claims is typically 14-21 business days.
Contacting Seenda Support
For any questions‚ concerns‚ or assistance with your Seenda wireless keyboard‚ our dedicated support team is readily available. You can reach us via email at support@seenda.com‚ providing detailed information about your issue‚ including the model number and purchase date.
Alternatively‚ you can visit our official website at www.seenda.com and navigate to the ‘Support’ section for FAQs‚ troubleshooting guides‚ and a contact form.
We strive to respond to all inquiries within 24-48 business hours. Our team is committed to providing prompt and effective solutions to ensure your satisfaction.